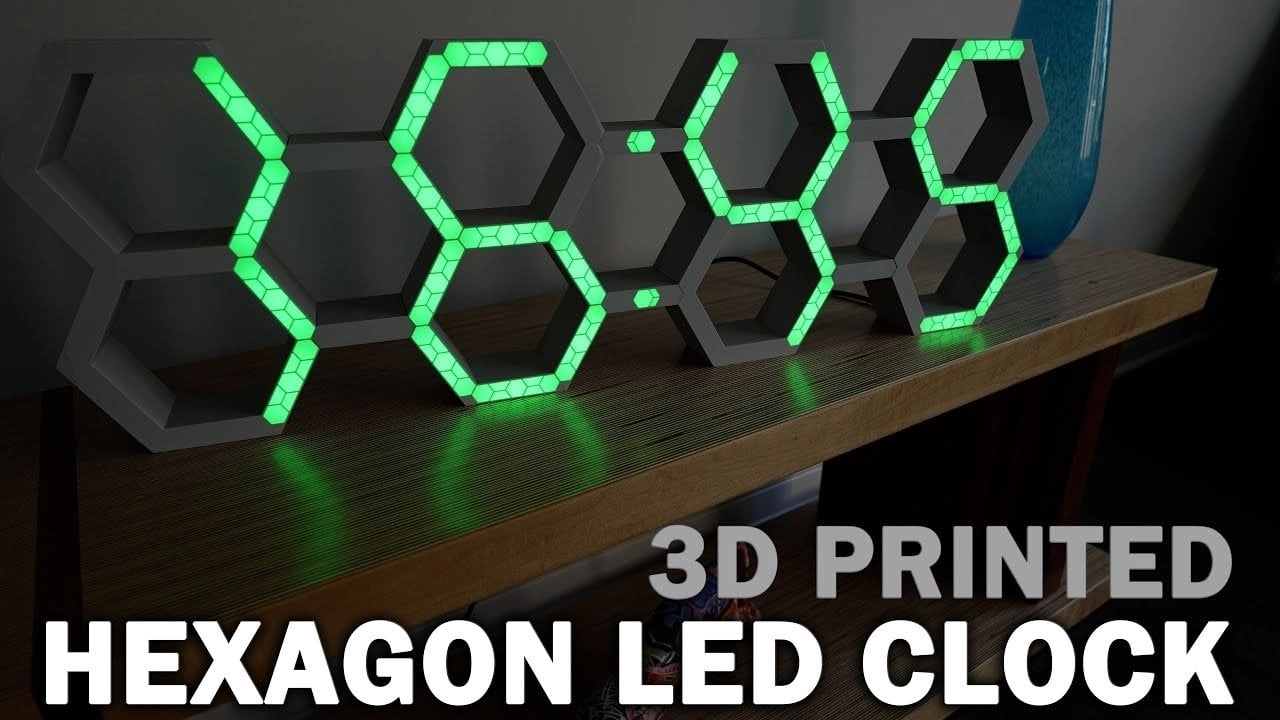
Have you ever considered that a clock could be more than just a tool for telling time? Imagine a stunning hexagonal LED clock that serves as both a functional timepiece and a captivating art installation. The hexagonal LED clock merges innovative technology with contemporary design. Utilizing 3D printing technology and essential components, this project allows you to create a unique clock that enriches your environment through its geometric beauty and customizable light patterns. This is an exciting opportunity for seasoned makers and curious beginners alike to explore creativity in timekeeping.
The DIY project, led by Andy Huot, guides you through creating the hexagon clock, from assembling its modular 3D-printed frame to precision wiring of the vibrant LED strips. You’ll discover how the clock’s integrated wireways and efficient LED layout contribute to both its functionality and visual appeal while also allowing you to tailor its design to your personal taste. This project strives not just to instruct but to inspire a new perspective on how we perceive time.
Why Choose a Hexagon Design?
The hexagonal design of the clock seamlessly blends aesthetic sophistication with practical functionality. Key benefits include:
- Modular Construction: The clock comprises four 3D-printed sections for the front and back, held together by smaller blocks, creating a lightweight yet durable build.
- Integrated Wireways: Built-in channels simplify wiring, keeping the internal layout tidy and reducing clutter.
- Efficient LED Layout: The hexagonal figure ensures even light distribution, ensuring that the clock is visually pleasing from all angles.
Key Components and Their Functionality
The hexagon LED clock’s performance relies on a carefully chosen array of components:
- ESP32 Microcontroller: This serves as the clock’s brain, controlling timekeeping and LED functions while allowing for customization.
- 12V LED Strips: Arranged meticulously for bright and consistent illumination, these strips enhance readability.
- 12V-to-5V Buck Converter: This component provides efficient power management to safeguard the clock’s electronics.
- Terminal Blocks: They simplify power distribution and logic shifting, easing the assembly process.
This flexible design invites extensive customization, such as experimenting with different LED colors and lighting patterns, enabling you to align the clock with your personal style or home decor.
Building a Hexagon LED Clock with 3D Printing
Here’s a step-by-step guide through the assembly process:
- Assemble the Frame: Connect the 3D-printed sections, ensuring wireways align for effective wiring.
- Install LED Strips: Place the LED strips strategically within the frame, routing wires through the channels.
- Mount Electronics: Position the ESP32 and buck converter, connecting them with terminal blocks for power and logic lines.
- Test Connections: Before powering up, double-check all wiring to prevent damage to the components.
- Fine-Tune Settings: Once operational, adjust the ESP32’s programming to customize LED brightness and patterns.
Crafting a Functional and Stylish Timepiece
Creating a hexagon LED clock is an enriching project that combines modern aesthetics with practical functionality. Through the use of 3D printing and advanced LED technology, you can produce a stylish and customizable clock that serves as both a timekeeper and an eye-catching decor piece. This modular design welcomes makers of all levels, resulting in a satisfying build and a stunning final product. Whether for enhancing your own space or as a unique gift, this clock stands as a significant statement of creativity and ingenuity.